Archive | August 2015

Formatting Your Book Using InDesign, Part 6

Now that you have your .mobi file complete, it’s time to create the ePub files you’ll need for other online retailers like iTunes, B&N (Nook Press), Kobo, All Romance e-books, Smashwords, etc.

To create an ePub file, perform the following steps:

  1. Open your bookfile
  2. Ensure none of the files in the bookfile are highlighted or open
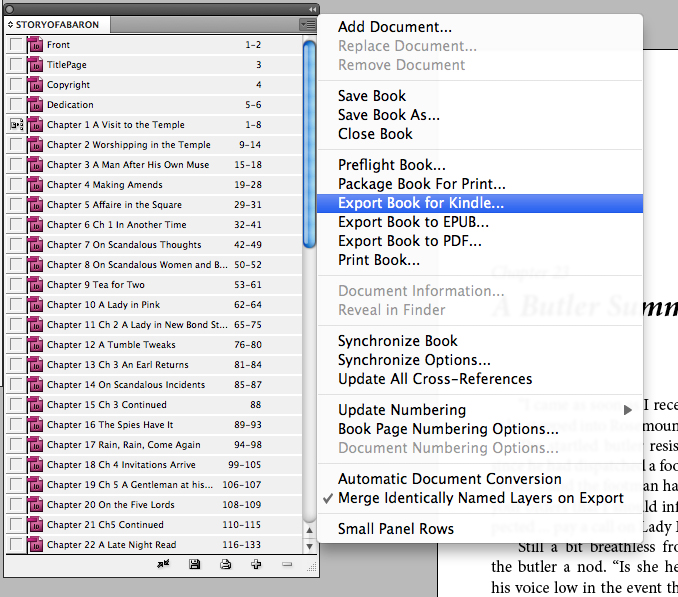
  3. From the bookfile palette menu, choose Export Book to EPUB.

Export_Book_for_epub

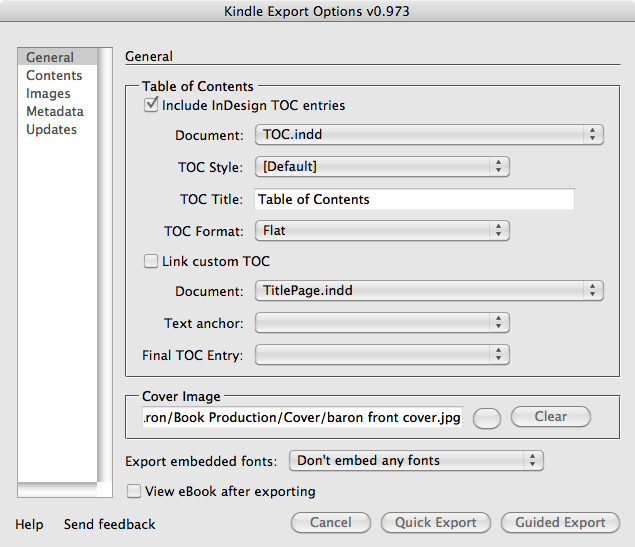
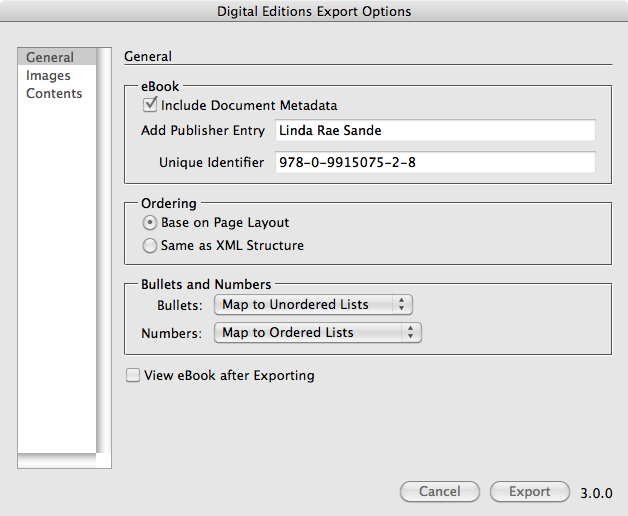
  1. In the General pane, enter the publisher information
  2. Enter the ISBN.

Note: ISBNs are required for iTunes, B&N and Kobo as well as other retailers. They can be purchased from Bowker at http://www.myidentifiers.com.

epub_export_general

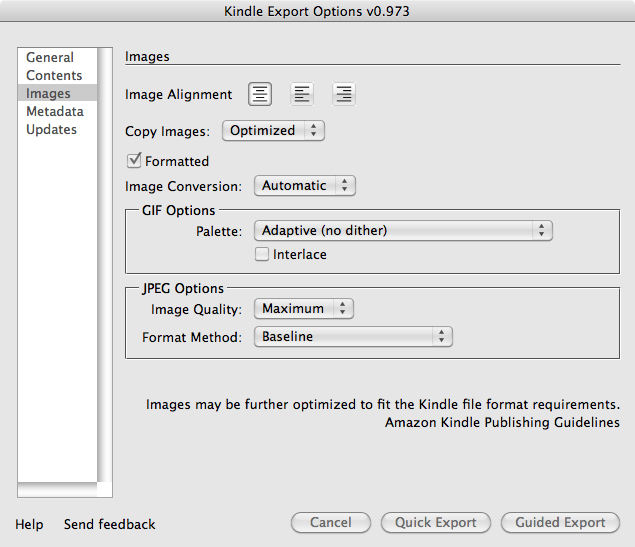
In the Images pane, complete the information as shown below if your book includes images other than the cover.

epub_export_images

  1. In the Contents pane, select the options as shown below
  2. Note the Table of Contents information
  3. Click Export.

epub_export_contents

Next, you’ll need to test your ePub file.

  1. Download Adobe Digital Editions from http://www.adobe.com/solutions/ebook/digital-editions/download.html. This free application will allow you to check your file for proper formatting and navigation.
  2. If you find a problem with formatting, usually due to incorrect paragraph or character style tags, go back to the InDesign source files and make the corrections.
  3. Regenerate the ePub file.

Your ePub file can be used without further manipulation on sites such as Nook Press and ARe. You will need to download and use Calibre, a free application, to manipulate your ePub to work on iTunes and Smashwords.

  1. In Calibre, run the Startup Wizard.
  2. For iTunes, select Apple and iPod/iPhone/iPad
  3. Add your ePub file and complete the metadata information for your book
  4. In the ePub Output screen, be sure to change the following:
    In Structure Detection, select Remove first image
    In EPUB Output, select Preserve cover aspect ratio
  5. Convert your ePub file
  6. Test the output on an iPad and take screenshots that can be used when you upload your book using iTunes Producer
  7. Rerun the Startup Wizard in Calibre for Kobo and repeat the steps to create a Kobo-specific ePub file.

That’s it! Once you have your ePubs uploaded to the various online retailers, it’s time to start writing another book. Good luck!

Formatting Your Book Using InDesign, Part 5

Now that you have your book formatted for paperback printing, it’s time to set up the table of contents necessary to produce the ebook versions of your book as well as generate the .mobi file for Kindle.

Setting Up a Table of Contents

To set up your book’s table of contents page, perform the following steps (note: this page will not appear in the ePub or .mobi file but is necessary for navigation on e-readers):

  1. Choose File > New > Document
  2. Select the preset template you set up earlier
  3. Choose Layout > Table of Contents
  4. From the Paragraph Styles palette, choose Load Paragraph Styles
  5. Select any chapter file
  6. Click Open
  7. Deselect all but the Title and h1 styles
  8. Click OK and save the file as TOC.indd.

load_styles

  1. Add TOC.indd to the very end of the bookfile and save the bookfile
  2. Choose Layout > Table of Contents
  3. Set the Style: to Title
  4. In Other Styles, click h1 and <<Title and <<Add
  5. Set Entry Style to TOC Body Text
  6. Click Include Book Documents
  7. Click OK.

toc_setup

  1. Click the cursor in the upper left of your TOC text frame. The word Contents and all your chapters should appear
  2. Save TOC.indd
  3. Save the bookfile.

TOC

To create the .mobi file for Kindle, perform the following steps:

  1. Install the free Kindle plug-in available from Amazon
  2. From the bookfile palette menu, choose Export Book for Kindle
  3. Choose where you want your output file to be saved
  4. Name the file bookname.mobi.

Export_Book_for_Kindle

In the Kindle Export Options dialog, complete the following:

  1. In the General pane, click Include InDesign TOC entries
  2. Select TOC.indd in the Document: popdown menu
  3. In the Cover Image field, click the blank button to the right of the empty field to browse and locate the JPG file of your book’s front cover
  4. In the Export embedded fonts topdown menu, select Don’t embed any fonts.

Mobi_screen

  1. In the Content pane, select the document’s Start Reading Location (usually the Titlepage.indd file)
  2. Select Preserve white spaces and new lines
  3. Select Preserve forced line breaks.

kindle_export_contents

If your book includes images other than the cover file, set up the images as shown in the dialog box here.

kindle_export_images

  1. In the Metadata pane, complete all the fields with your book’s information
  2. Click Guided Export.
  3. Note: You may see an error warning the first time you attempt to generate a .mobi file. Simply select Export Book for Kindle from the bookfile again. All the information you entered in the Kindle Export Options pane will still be there. Click Guided Export and the conversion should begin.

kindle_export_metadata

Now it’s time to test your .mobi file to be sure everything has converted correctly.

  1. Open the .mobi file in Kindle Previewer (a free app from Amazon)
  2. Review the file to ensure proper translation
  3. Fix any issues in the InDesign source files (these would include any incorrect paragraph or character tagging)
  4. Regenerate the .mobi file
  5. Review the file in Kindle Previewer
  6. When you are satisfied with your .mobi book, upload it to Amazon in your KDP dashboard.

Next time, we’ll cover how to create an ePub file for other ebook retailers.